Feeds:
Posts
Comments

Archive for June, 2011

Here is my way of freezing veggies.   I just want to say that I have been doing this for 20 or more years and no one has ever gotten sick.   With that stated, here is the USDA guide to freezing veggies, if you want more information.   You can use this method with either store bought veggies, or those picked in your garden.

Green Beans and Broccoli

Today we are going to be doing green beans and broccoli.   Lets start with the green beans.   My kids like there green beans whole, so I only take off the ends of each bean.

Prepping the Green Beans

However, if you want snap beans (like you get in the can), you will need to remove the top (bottom is optional) and snap each bean into 1 in sections.   The bean at the bottom of the photo has been snapped so you can see what they should look like.   You can discard the bottom and tops.  (They go really well in a compost pile!)

While you are prepping your beans, you are going to want to get either a slotted spoon or spider skimmer and a pot of water.

Rolling Boiling Pan of Water

(I don’t have alot of fancy tools in my kitchen, so your favorite long handled slotted spoon will work just fine.)

You need to get your water to boil rapidly before you put your veggies in.

You also need to get your cold water station set up.   It is best if you can add ice to the water, but since I don’t have an ice maker, I will show you how I deal with that small issue.  You are going to need a colander and a big bowl.

Big bowl of cold water and a colander

The bowl needs to be filled with cold water and ice (if you have it).   Here is what my set-up looks like:

You need to have enough water in your bowl so that the veggies you are taking out of the boiling water will be submersed in the cold water

Okay, so we have boiling water, a bowl of cold water, and our veggies prepped.   It is time to start working.   This all happens REALLY quickly, so if you don’t have everything set up ahead of time, you will end up with mushy veggies.

You are now going to take the green beans and put them into the hot water.

Green Beans in their sauna

They are going to start to turn a really nice bright color.   Depending on your veggies, it will take 1 -3 minutes for this to happen.   It will also depend on the size of your veggies as well.   Green Beans and Broccoli turn the best green color ever!

Once this green color occurs, you need to get them out of the hot water and immediately into the cold ice water.    You are wanting to stop the cooking process as quickly as you can.

Out of the sauna and into the ice bath!

So lets say, for example, your ice maker doesn’t work, and you don’t have any ice cube trays.    I have this exact problem.   So when I pull them out of the hot water and I  put them in the bowl/colander with just cold tap water.

About to be gift wrapped

After all the green beans are out of the hot water, I pull the colander out of the cold water, and place the veggies in a clean kitchen towel.    Then I wrap the towel up and place it in the freezer.

Again, I do this because I want to stop the cooking process and get the veggies as cold as possible quickly.

The wrapped green beans in my freezer

If you are doing small batches like I am at the moment, this isn’t going to hurt your freezer.   If you are going to be doing huge batches, invest in some ice.

You only need to leave them in the cold water or the freezer for a few minutes, until the green beans are cold enough to handle with your hands.

Green Beans ready to go into the freezer.

Take your veggies out of the freezer or the cold water bath, and place them on a clean dry towel.    I like to let my veggies dry out for a little bit before I place them in ziplock bag.   Because this is the first time I have had green beans this year to put up, I am starting with a fresh bag.   I only mark my bags with the year and what is in them.

Please mark your bag, or in the winter you are going to play:  Are these green beans, green peppers, broccoli, spinich, ??   Trust me on this!

Okay, so broccoli is done pretty much the same way.   Have your veggie prepped, boiling hot water, and the bowl of cold ice water.     Once your broccoli gets nice and green after being put in the hot water, pull them out and place them in the ice bath.

Brocolli being cooled off

The next part is going to seem a bit disgusting to some folks.   But I don’t want you to be worried or afraid.   Veggies grow outside.  Bugs are outside.   Bugs like to eat veggies.   If you don’t use pesticides on your veggies, you are most likely going to find bugs.

Cabbage Looper

This is one that you probably find on your brocolli.   He is called a Cabbage Looper.    This is the first one I have found this year on my broccoli.  I have been doing a great job of keeping them controlled (that is another article).

If they are on your broccoli, you will find them floating to the surface in the boiling water.    They don’t like the boiling water, let go from the broccoli and are dead when you find them.   Just be on the look out for them when you are pulling your broccoli out.   They are harmless (except to your garden), and actually turn into pretty white butterflies.

All the broccoli in the bag!

I have already started a broccoli bag.   So after I have let my broccoli rest on a towel to dry for a bit, I pull my bag of broccoli from the freezer and add the broccoli I had just blanched to it.      Seal it back up and put it back in your freezer.

If you want to have individually frozen veggies so that they aren’t all stuck together, you will want to place each veggie on a cookie sheet.   Put them on a level surface in your freezer for a few hours.   Once they begin to freeze, you can put them in a freezer bag.     I don’t mind a big blog of veggies.  I just bang it on the counter to break it up a bit and then cook them.

Good luck blanching your veggies before you freeze them.

Read Full Post »

Well I thought it would be time to update my garden pictures and progress.    Where do I start?

I guess with the strawberries!   I got about 4-5 gallons of strawberries out of my patch this year!   They are all frozen now and will be made into jelly and jam within a few weeks depending on when the tomatoes and cucumbers come in strong.   I am really pleased with my strawberry patch.   It is really low maintenance for me.   I really don’t do much other than weed it when I feel like it and try to keep the runners in the area I have allocated for them.    Later this year, we are going to be transplanting strawberries to there own garden plot.   It will be rather nice!   I will update pictures once we start building.

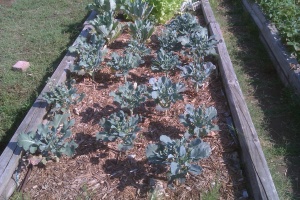
On to the main garden:   I have been cutting broccoli for a month now.   The main broccoli heads didn’t get very big but that is okay.  I will research why later.   But I am getting florets like crazy!   The more you cut, the more florets you get!   That is all my family likes anyway.    I do have a rather large pest that is eating alot of my broccoli.  Okay, she isn’t exactly a pest…   My daughter is my broccoli eater.

Broccoli and Cauliflower

She eats it as I am cutting it and putting in my basket to bring in the house.   =)   What a great problem to have!    Some of you might notice that some of the broccoli has flowers on it.   =(   I didn’t get out to cut it the last few days and so some of it flowered.    So those florets are lost and will go into the compost pile.

The cauliflower has small heads on it too!    Becca and I are the only ones who eat it, so small heads are perfectly fine with me!   It will be about another week or so before we cut it!  Once it is cut, it is done!

In the front, you might see little springs of green.  This is my asparagus.   I have never grown asparagus before.   I don’t know if I am doing it right.  But they are getting bigger and still green, so I am going to venture to say, something is going right.

Lettuce

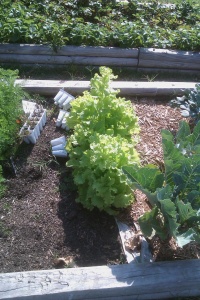
The next in my garden is lettuce.    I have mixed feelings on lettuce.   I grew it last year.   It looked great, but tasted bitter.    All of it.    I babied those heads of lettuce through snow.   Ugh.  Was so disappointed.    This year I tried a different lettuce and well not as yummy as I thought it would be, but not horrible either.   I don’t think I am going to plant it again thought.

Carrots

Carrots are right next to the lettuce!  They are looking gorgeous!

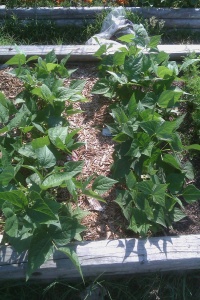
I have been picking green beans for a week!   I was worried that they came in hodge podge.   But actually it was a good thing!   I have well developed bushes and they are each producing a nice number of beans every other night!   In fact I have some in the kitchen right now that I need to freeze!     And I am sure there will be more green beans to pick tonight.

Green Beans

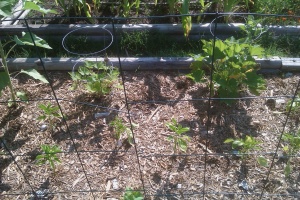
So here is what is left in this bed:   Zucchini, cucumbers, green/red sweet peppers, and sunflowers.     The zucchini are producing flowers, but I have yet to see a zucchini form.    Fairly frustrating.   Maybe I should look into just stuffing the zucchini flowers and be done with it.   (Yes, you can eat zucchini flowers.   No, I haven’t ever harvested them nor ate one.)   Cucumbers.   These bad boys should be named patience.

cucumbers, zucchini, and green peppers.

As I have been watching them for weeks.   I have almost pulled them out a few times.    But my gut said just a little more time……    Well they are just now beginning to grow more than 3 leaves!   These are the slowest growing cucumbers I have ever seen.    I am hoping I am eating those words in a months time!      My green and red peppers.   They are adapting once being transplanted and I see a few trying to produce flowers!   Which is a good sign in my book.   I was hoping they would be a bit further along by now, but again, patience.    Is God trying to communicate with me through my garden?    Interesting possibility.   And the sunflowers… boy oh boy!  they are going to be GORGEOUS once they start producing flowers!  I cannot wait!

Are you still with me?   This seems like it is awfully long… But full of lovely pictures!   So onward we go to tomatoes.

Tomatoes

We have already had our first tomato.  It didn’t last long.  Remember that pest I had with the broccoli, well it is starting in my tomatoes as well.    I planted an entire tomato plant for her to eat.    Becca found a red cherry tomato and we picked it and promptly in the mouth it went.  (There is a reason I don’t use any sprays or what not in my garden!)  For those just seeing this for the first time, I planted 3 different types of tomatoes: a purple heirloom (first time for heirlooms, so we shall see), regular canning tomatoes, and a cherry tomato (for that pesky veggie eating child of mine).  I need to start stringing them up into the tomato fences I have up!   We have lots of green tomatoes on the vines.   As Becca says:   We are just waiting for the sun to paint them red!   Isn’t she so cute!

And then we have the corn.   During the last bad storm we had, the winds pushed over my corn.   This seems to be a

Sweet Corn

a problem with the corn I grow in my raised beds.   And here is how I fix it.   I just get a bag of soil and start mound the soil around the bottom of the stalk.    I mound it up a good 2-3 inches.    I don’t know if that is professionally how to fix the problem, but it seems to work which makes me a happy gardener.

Here are some of my herbs I am growing.   My oregano came back this year on its own!  And it seems to like where it is living so I am leaving it alone!   yeah!

Oregano

Yeah I know.. the weeds.. they need pulling!    My rose garden is where the oregano is planted.   And it needs lots of help!   I have some poison ivy growing in there and I am highly allergic to it.   And I am not sure how to get rid of it without killing my rose bushes at the same time.

basil in a soda bottle

Yes, you are seeing that right!   I am growing my basil in a soda bottle.   And more specifically, I am growing a lot of herbs in a soda bottle.    So far I have chives, thyme, sage, basil, parsley, and onions.     I am not sure the basil is convinced that it likes the soda bottle.  I think I am going to go put it back with the cilantro.   They guys seem to like each other.   The sage is in love with his soda bottle planter!   And I love them!    I can see when they are low on water.   I am hoping to bring them in the house so I can have herbs all winter long.   (Is that even possible?)  Not sure we shall see.     I am going to sow some carrot seeds in one as well to see if we can see the carrot “grow” in the soil.   It might be a science project for the kids.   =)

Well that is the garden for now!   I will update when the tomatoes start coming in, so you can see how I make my tomato sauce!  It is SUPER easy!

Read Full Post »